Scan QR code and communicate with project manager
We look forward to your voice on wechat 24 hours
Business consulting/Technical consultation/ Technical consultation/ Technical consultation
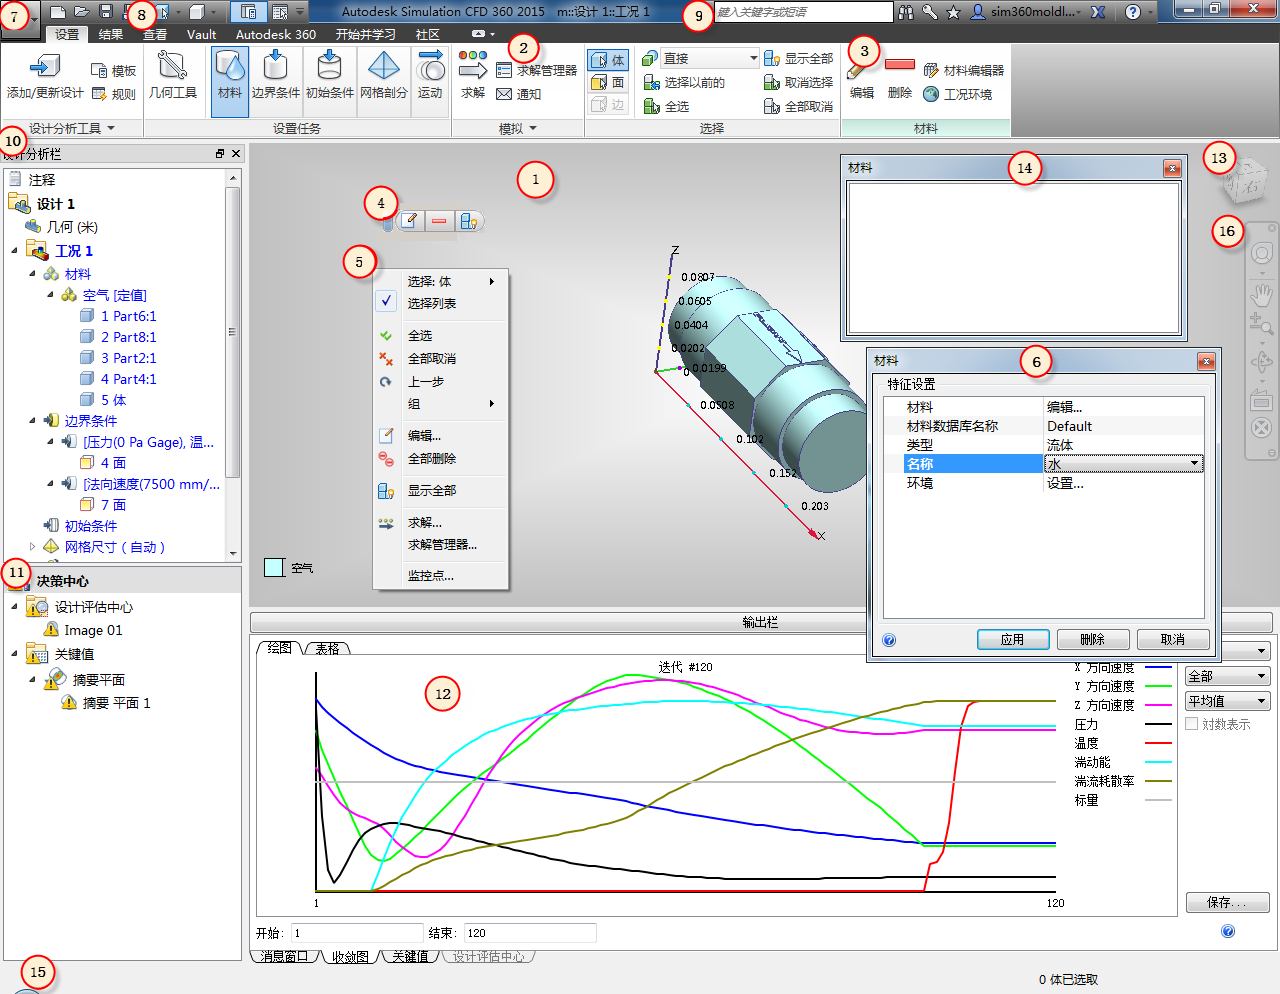
**Overview of Autodesk® CFD User Interface**The following is the default layout of the Autodesk® CFD user interface:1. Graphics Window: Viewing the ModelThe background color in the


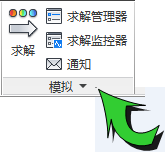
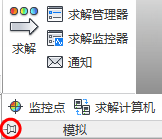
By default, the menu disappears when the mouse is removed. To lock the drop-down menu, click the fixed icon:

To hide the drop-down menu, click the fixed icon again. Customize the Ribbon You can modify the appearance of the ribbon to suit your personal preferences. Steps to change the position of a panel: Place the mouse cursor over the panel title. Click and hold down the left mouse button. Drag it to the desired position. Note: You can move the panel to another position within the ribbon or completely out of the ribbon. Steps to return the panel to its default position: Drag the panel to its original position in the ribbon. Alternatively, hover the cursor over the panel until the border appears, and then click the "Return Panel to Ribbon" icon.

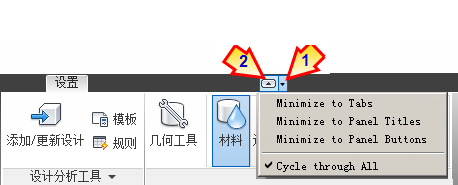
Steps to hide a panel: Right-click on the panel title. Expand the "Show Panels" list. Deselect the name of the panel. Steps to minimize the ribbon: There are three minimization modes for the ribbon: Tabs, Panel Titles, and Panel Buttons.

To select a mode, click the menu arrow on the right side of the tab label (1), and then make a selection from the list. To minimize the ribbon to the selected mode, click the arrow button (2). To restore the ribbon to its standard configuration, click the arrow button again. Note: To switch through each mode one by one using the arrow button, select "Cycle through All Items". 2. Ribbon: Tabs There are four separate tabs in the ribbon. Each tab serves a specific purpose and is useful throughout the simulation process. The following briefly describes the controls on each ribbon tab: Setup Use the "Setup" tab to define and run simulation models:


Use the following features to create and share images for design collaboration and design comparison: Image.
Select the activity results tool from the following location: Results Task. (Note that each task generates an additional context panel.)
Use the Report command to pass the simulation results.
Use View to extract information about the current condition.
If the condition has continued more than once, or if an intermediate iteration has been saved, select the iteration you want to view from the following location: Iteration/Step.
Note: The Results Task panel contains the main tools for extracting and interpreting simulation results.
view
Use the View TAB to control the appearance of the model and customize the user interface:

Save the view and apply it to other models using the following features: View Settings.
Use the following functions to control the display of the model: "Appearance".
Configure the user interface and graphical Windows using the following functions: Windows.
Control model position, orientation, and scaling with the following functions: Navigation.
Vault
Use Vault to store and manage Autodesk® CFD data in Autodesk Vault.

Enter Vault from Autodesk® CFD using Access.
Use Workspace to manage and access local folders where data is stored when checked out from the Vault.
Use File State to create and modify simulations of geometry stored in Vault. Simulation files can also be checked in and out.
Autodesk 360
Use Autodesk 360 to sync Autodesk® CFD results images and Settings files to the Autodesk 360 Documents folder

Use the File command to manually sync data to an Autodesk 360 account.
Use the Access command to manage the local cache and Autodesk 360 folders.
Use Analog Sync to configure the mode for automatically uploading analog data to Autodesk 360.
Start and learn
Use the Start and Learn TAB to create or open a design analysis and browse help resources:

Create or open a design analysis using the following features: Launch. (This is an alternative to booting from CAD.) In addition, access the Design Analysis Automation tool before opening the design analysis and specify the user interface Settings.
Use the following features to learn about the new features: "New Features".
Use the following features to browse help and learning resources: Learn.
Use the following features to view product and license information: Product Information.
community
Use the Community TAB to interact with other Autodesk® CFD users

Connect to other Autodesk® CFD users. You can share knowledge, collaborate with other users, and share your thoughts on enhancement requests.
Expand your experience and get access to the latest technologies and innovations from Autodesk.
Participate in the Desktop Analytics program and contribute to the development of Autodesk® CFD.
3. Context panel
Controls in (Settings > Set Tasks) and (Results > Result Tasks) invoke specific task modes that are basic steps in the Autodesk® CFD process. Some common controls related to active tasks are displayed on an additional context-sensitive panel located to the right of the ribbon.
For example, when the Materials task on the Settings TAB is active, the Materials context panel will display as:

When the Global task on the Results TAB is active, the Global context panel appears as follows:

When the "View" and "Quick Start" tabs are also selected, you can access the active context panel. This gives users uninterrupted access to the main controls even if they leave the Settings or Results TAB.
Note: Most context panel controls can also be brought up by right-clicking the menu and left-clicking the context toolbar.

We look forward to your voice on wechat 24 hours
Business consulting/Technical consultation/ Technical consultation/ Technical consultation